Schritt 1
Das WooCommerce-Demo-Produkt erstellen
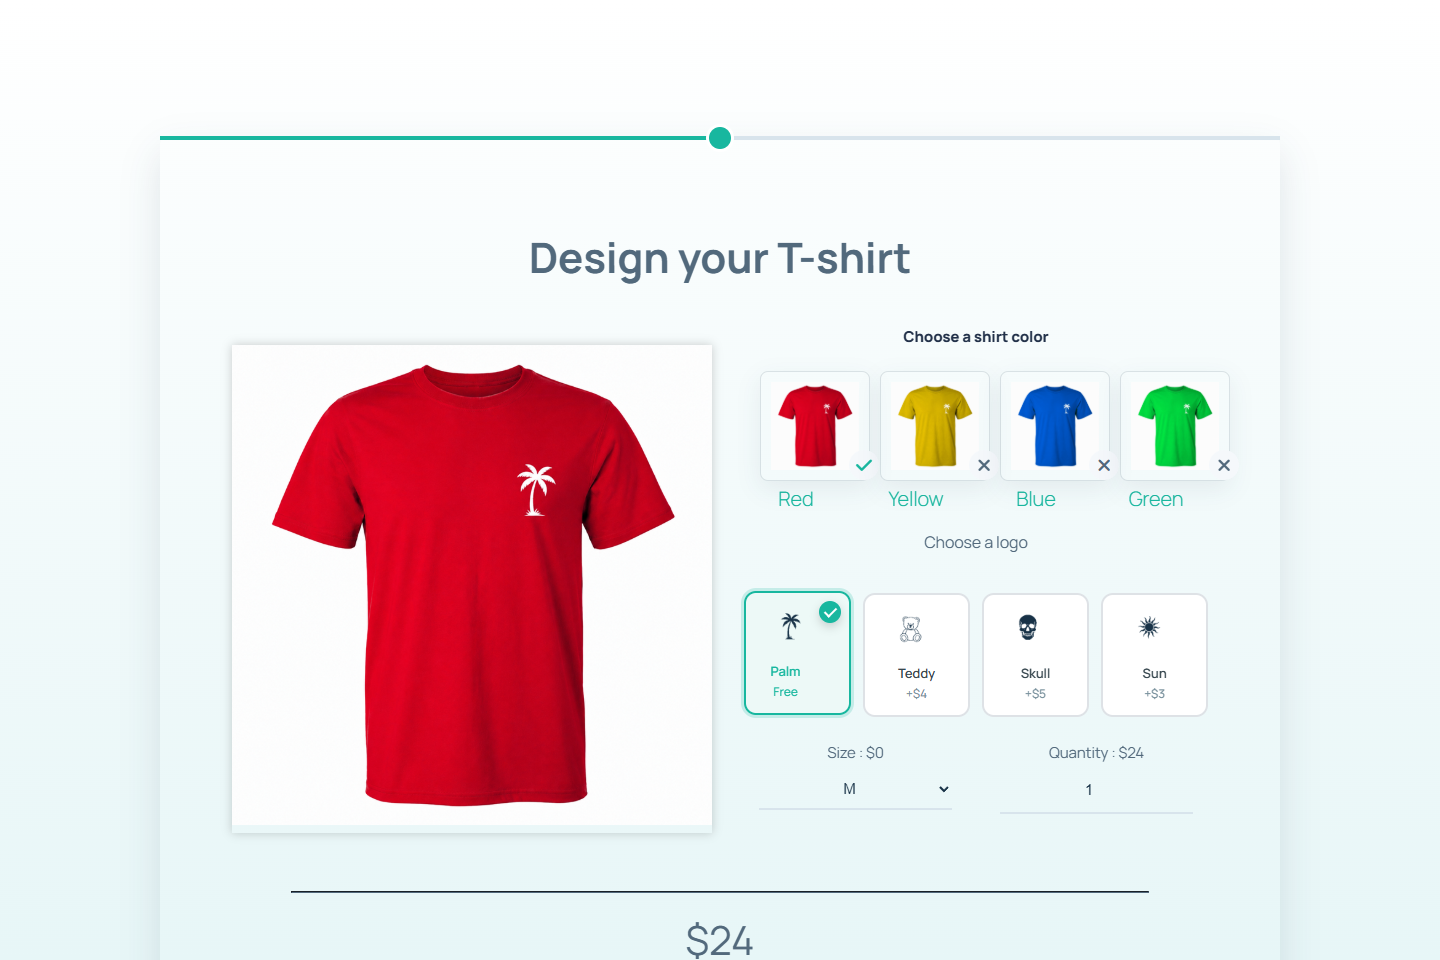
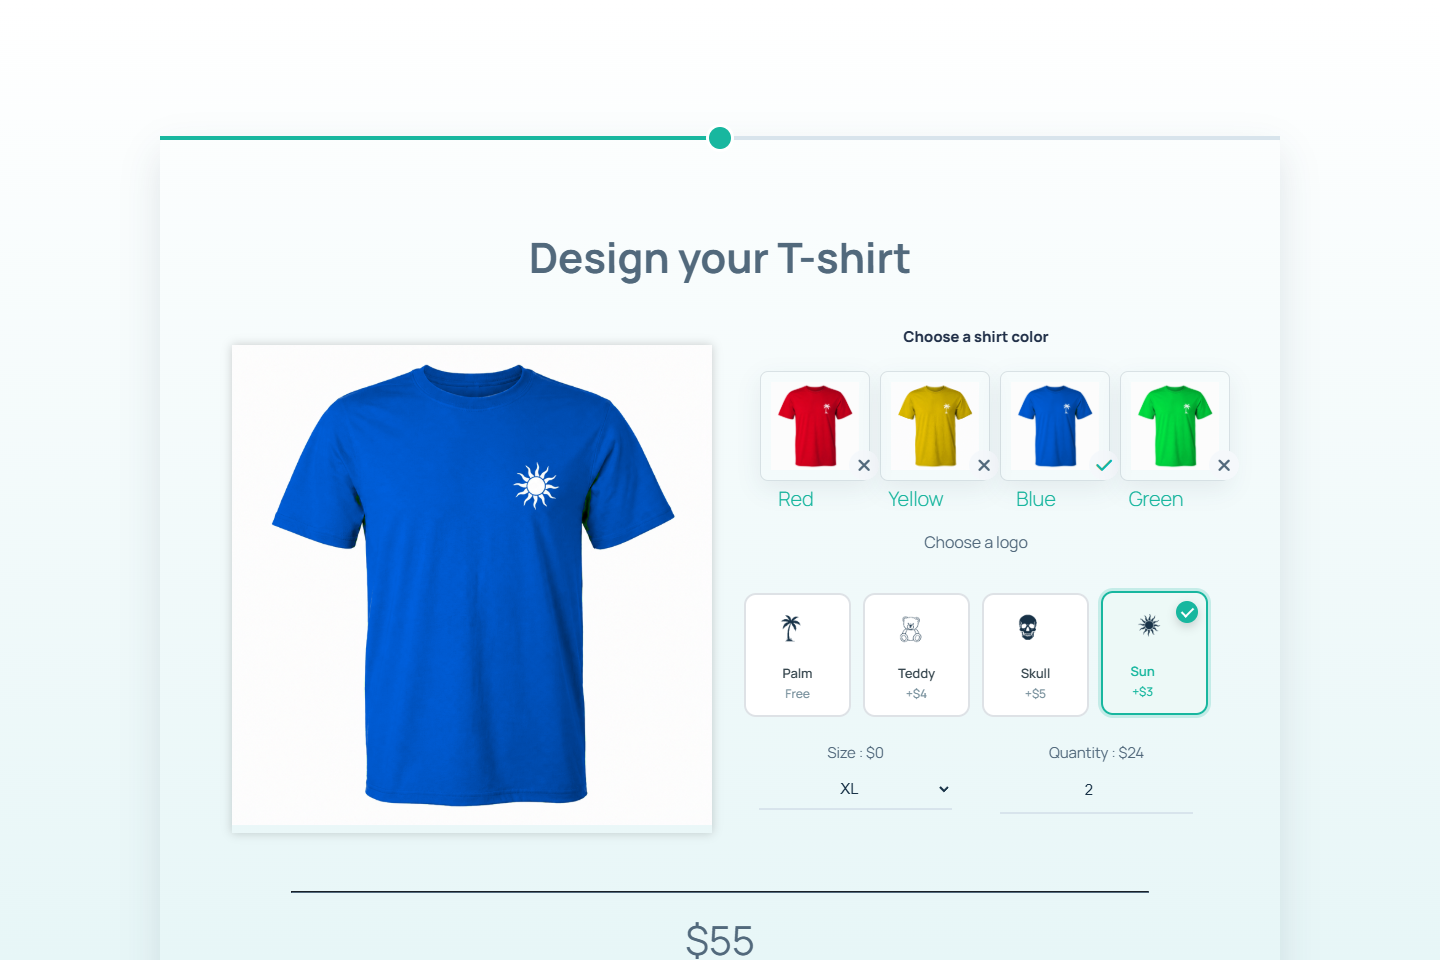
Starten Sie mit einem einfachen WooCommerce-Produkt, das den zu konfigurierenden individuellen Artikel repraesentiert. In der Demo heisst das Produkt Demo Individuelles Logo-T-Shirt und nutzt einen Grundpreis von 24 $.
Der Rechner kann dann die Produktoptionen erfassen, den konfigurierten Preis berechnen und eine lesbare Zusammenfassung in den WooCommerce-Workflow uebergeben.
- Verwenden Sie einen klaren Produktnamen.
- Setzen Sie den Grundpreis, bevor Sie Optionsaufpreise hinzufuegen.
- Verwenden Sie ein Produktbild, das zur Standardvorschau des Rechners passt.