
Step Edition
Customize each step with titles, descriptions and display options.
Efficient Step Editing with WP Cost Estimation & Payment Forms Builder
Accessing the Step Edition Panel
To commence step editing, click the "Edit this step" button on the desired step circle from the "Steps manager" panel:
Step Builder Interface
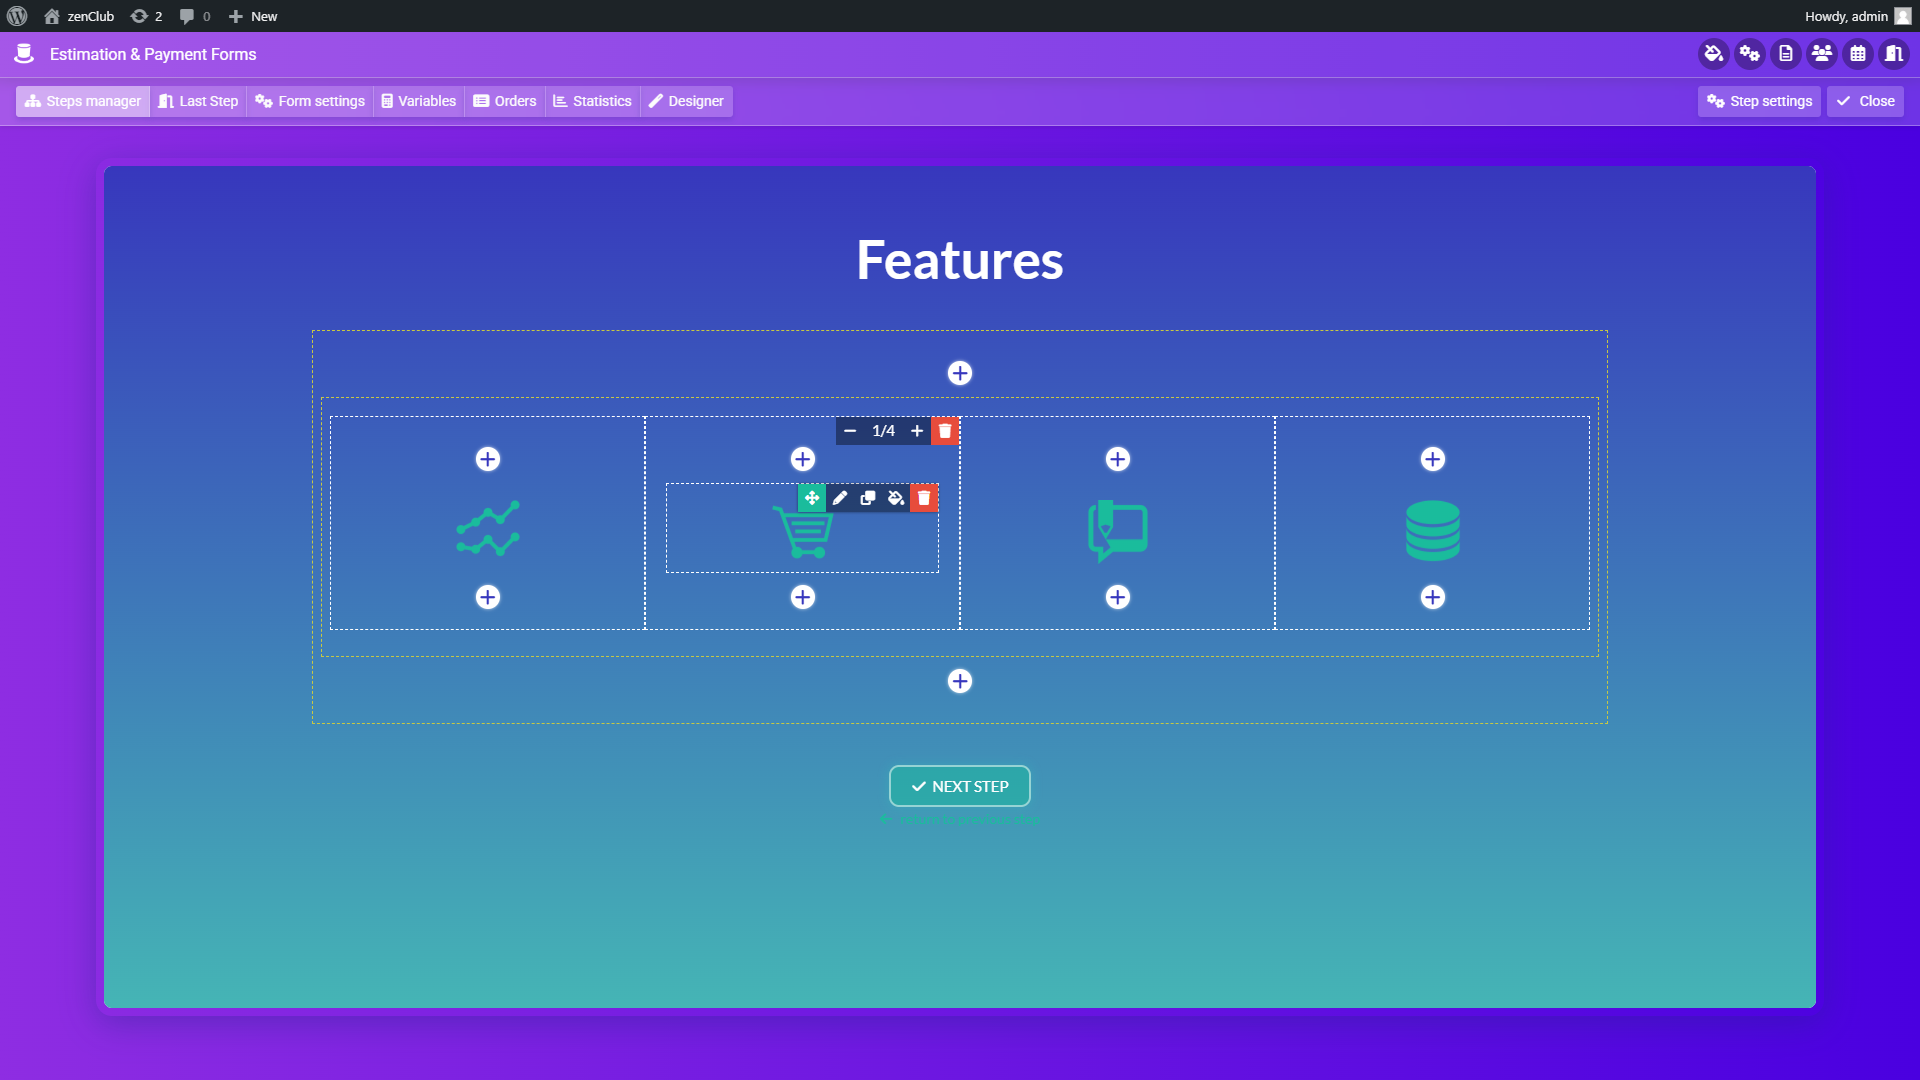
Understanding the Step Layout
The step layout comprises rows, where each row contains columns, and each column houses the item components. Create new rows by clicking the green "+" buttons situated at the top and bottom of the step content:
Editing Rows
Hover over a row to reveal its edition menu:
Row Edition Menu
Drag to reorder rows
Add a new column to this row
Edit row properties
Edit the styles of this item
Delete row and its contents

Managing Columns
Click the "+" button to add a new column in a row. Alter the size of a column via its toolbar, which appears as you hover over it. Add new components within by clicking its gray "+" buttons:
Column Menu
Increase column width
Decrease column width
Delete column

Editing Components
Similarly, hover over a component to view its menu, and click the pencil icon to edit it:
Component Menu
Drag to reorder the items
Edit item properties
Duplicate this item
Edit the styles of this item
Delete this item

Sorting and Deleting
- •Employ drag & drop to move and sort components and columns for the desired layout.
- •To delete a column, ensure you first remove the contained components.
- •Click the pencil icon in the component toolbar to edit its options.
Pro Tip: Plan your step layout before adding components. A well-organized layout will make your form more user-friendly and easier to maintain.